When it comes to holiday cookies, there’s nothing more impressive than a perfectly decorated cutout cookie. And while we love cheery holiday elves and festive Christmas cards, snowflakes are one of our all-time favorite shapes. Here’s how to decorate snowflake cookies like a pro.
Before You Begin: Bake and Ice Cookies
Before you add the pretty snowflake design, you’ll need to bake and ice a batch of cookies! For this step, you can use your favorite cutout cookie recipe. We used gingerbread, but any sturdy cookie will work. Use snowflake cookie cutters to shape your cookies, then bake according to your recipe’s instructions. Cool completely.
Then, mix up a batch of royal icing. (We shaded our icing with blue and violet food coloring.) Using a piping bag, flood each cookie. Make sure you reserve a little extra icing—it’s the “glue” that you will use to attach the fondant flakes. Once your icing has dried, you can move on to the next step: homemade marshmallow fondant cutouts
Ingredients:
- 2 teaspoons water
- 3-1/2 cups miniature marshmallows
- 2 tablespoons shortening
- 2 cups confectioners’ sugar, sifted
- Additional confectioners’ sugar for dusting
- Reserved royal icing
- Luster dust

Step 1: Melt ‘mallows
Start by combining the marshmallows and water in a large, microwave-safe bowl. Heat the mixture on high for 30 seconds, then stir. Continue microwaving—stirring every 30 seconds—until the marshmallows are smooth and completely melted. Then, transfer the mixture to the bowl of a stand mixer.
If you’ve never made or worked with fondant before, check out this guide first.

Step 2: Add shortening
Turn your mixture on to medium speed, then add the shortening. Beat until the shortening has melted and is fully incorporated.
Editor’s Tip: For this step, you’ll want to work quickly. The warmth of the melted marshmallows is what helps the shortening incorporate.

Step 3: Beat it, just beat it
If you have a stand mixer splash guard, put it on. Because this step can get messy! Turn your mixer to the lowest speed, then gently add the confectioners’ sugar, a little bit at a time. Keep beating until the mixture is fully combined. Congrats, you just made fondant!

Step 4: Dust and transfer
Take your reserved confectioners’ sugar and generously sprinkle it over your workspace and hands. Turn the marshmallow mixture onto the counter.

Step 5: Knead, knead, knead
Start kneading the fondant until it’s smooth and pliable—but not sticky. This should take about 6 minutes. Keep some extra confectioners’ sugar close by in case you need to re-dust the counter or your hands.

Step 6: Roll it out
Dust a rolling pin with confectioners’ sugar, then roll out your kneaded fondant until it’s 1/8-inch thick.

Step 7: Cut your snowflake shapes
Dip your snowflake-shaped cookie cutters in confectioners’ sugar, then use ’em to punch out shapes from the fondant. To give your cookies a more unique look, use cutters of different shapes and sizes. (After all, no two snowflakes are alike!)

Step 8: Attach fondant
Remember that royal icing you set aside? Go grab it and give it a quick stir. Using a piping bag or a toothpick, gently draw several dots on the back of a fondant snowflakes. Adhere the flake to one of your iced cookies. Let stand until set, and repeat with remaining fondant flakes.
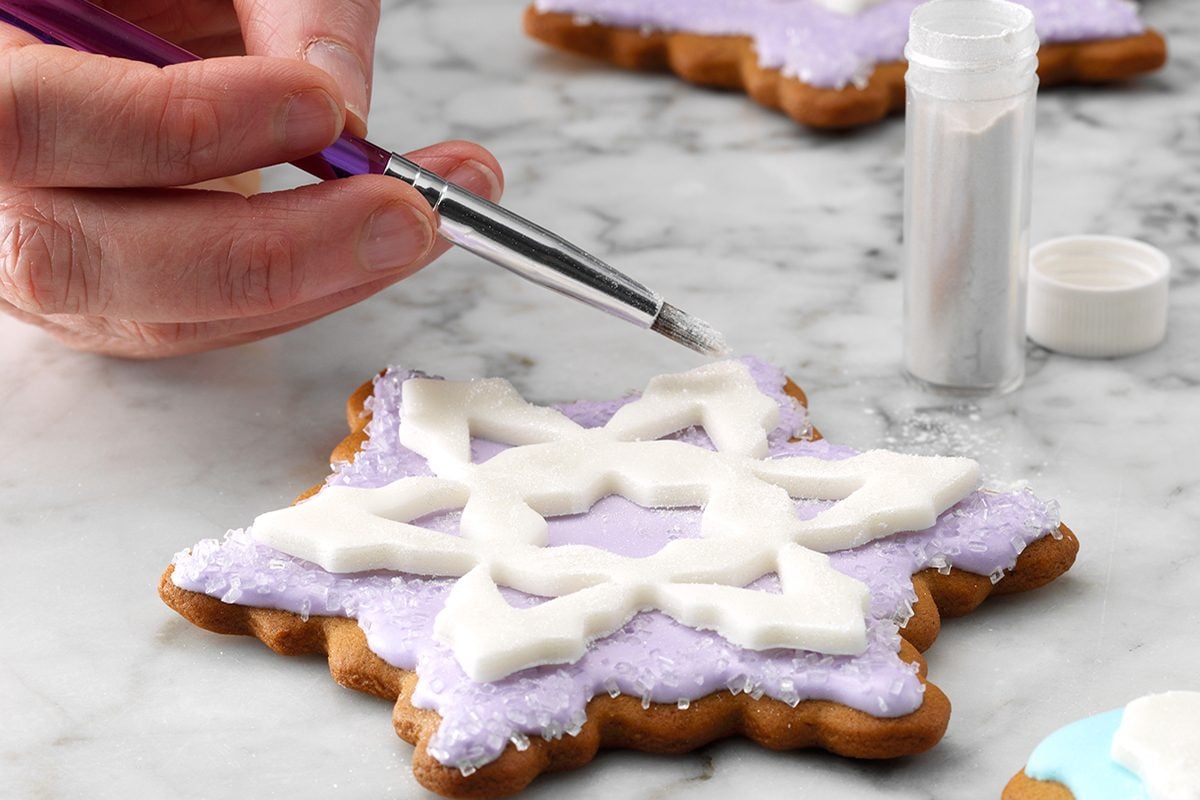
Step 9: Brush with luster dust
For an added touch of glam, use a clean brush to apply luster dust to your finished cookies.
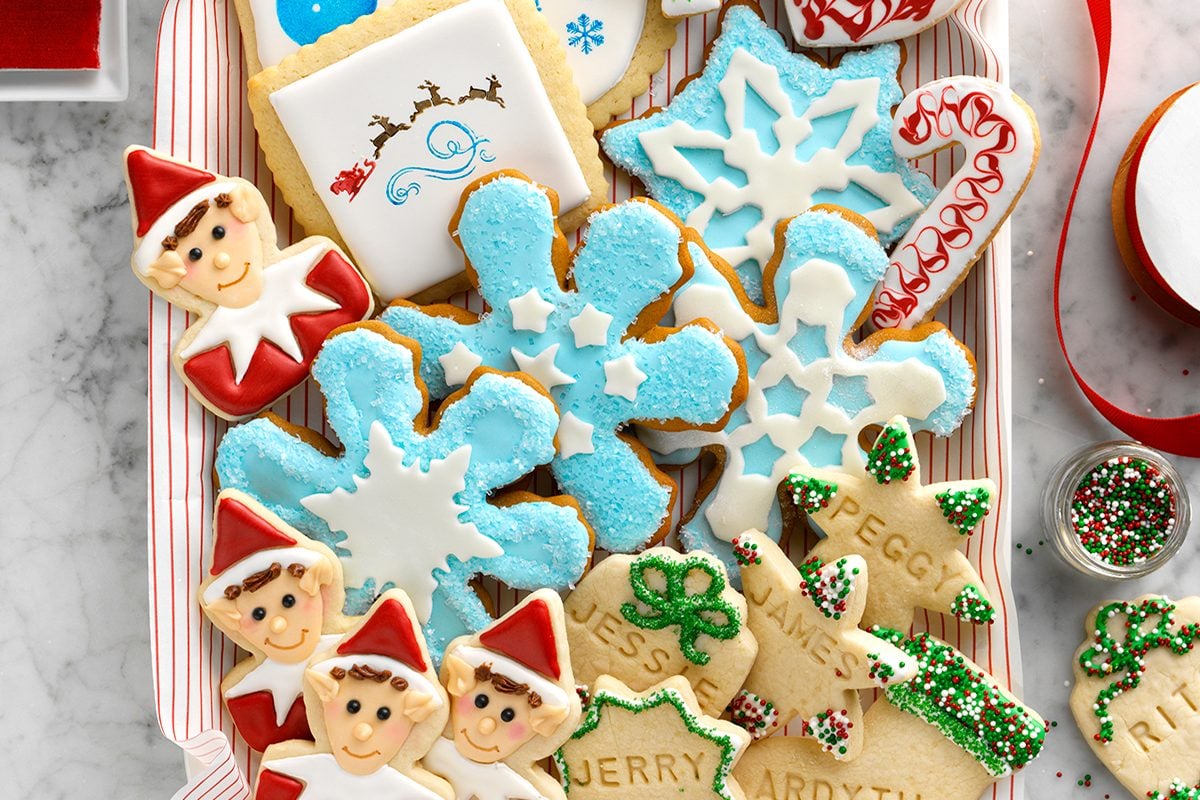
Step 10: Plate and serve
Whew! You did it. Place decorated cookies on a festive plate and go grab a glass of milk. Store leftovers in an airtight container.
Find More Decorated Christmas Cookie Ideas
“As a girl, I helped Mom make these crunchy cutout cookies. Iced and sprinkled with colored sugar, they're the best!” —Sonja Stromswold, Mohall, North Dakota
Get Recipe
Though they hold their cute snowman shape well, these cookies are still nice and soft. Kids love the design and everyone loves the chocolate flavor packed into the cookie.—Evangeline Bradford, Erlanger, Kentucky
Get Recipe
Santa is sure to stop by your house if you leave these minty chocolate cookies waiting for him. They're quick and easy for the whole family to make together. —Teresa Ralston, New Albany, Ohio
Get Recipe
I created this cookie recipe because my sons liked eggnog so much. After frosting the cookies, you can add to their festive flair by sprinkling them with colored sugar. —Glenna Tooman, Boise, Idaho
Get Recipe
Here's a fun holiday recipe children can help with. And no cookie cutters are needed! I just shape the dough into a triangular log, refrigerate it and cut it into tree-shaped slices to bake and decorate. Broken pretzel sticks form the tree trunks. —Phyllis Schmalz, Kansas City, Kansas
Get Recipe
I've used this recipe for almost 40 years and love it because it's a little different than most. My mom always made Santa cookies, and we'd put them into little clear bags tied with ribbon to hang on the tree.—Ann Bush, Colorado City, Colorado
Get Recipe
I loved finding deer tracks in snow when I was a kid. One day I was looking at coffee beans, and I realized they look like little hoof prints. That's how I came up with this fun recipe.—Crystal Schlueter, Northglenn, Colorado
Get Recipe
At least two generations of my family have enjoyed the recipe for these delicate orange-flavored cookies. —Sheri DeBolt, Huntington, Indiana
Get Recipe
"This is my son's favorite Christmas cookie. It is a very old recipe that I have used many times." These delightful gems have great nutmeg flavor and are a perfect way to ring in the holidays. – Janie Colle, Hutchinson, Kansas
Get Recipe
This recipe for peppermint meltaways is very pretty and festive-looking on a cookie platter. I often cover a plate of these peppermint cookies with red or green plastic wrap and a bright holiday bow in one corner. And yes, they really do melt in your mouth! —Denise Wheeler, Newaygo, Michigan
Get Recipe
I treasure my mother’s recipe for these comforting cookie pillows. The tender treats are topped with thick frosting and a sprinkling of chopped walnuts. —Jane Darling, Simi Valley, California
Get Recipe
These soft, cake-like cookies have a pleasant anise flavor that's distinct but not overpowering. I add red and green sprinkles for Christmas, but you could decorate them to suit any occasion.—Janice Eanni, Willowick, Ohio
Get Recipe
When I spread these spicy gingerbread rounds with my lemony cream cheese frosting, I knew I had a hit. Cardamom and allspice add a hint of chai tea flavor. —Aysha Schurman, Ammon, Idaho
Get Recipe
A few ingredients and a tube of cookie dough make these luscious treats a breeze to whip up. The beautiful swirled colors will look gorgeous on your holiday cookie tray! —Taste of Home Test Kitchen
Get Recipe
Eggnog stars in both the cookie and frosting in this new-found recipe, imparting a subtle holiday flavor.—Amanda Taylor, Glen Ewen, Saskatchewan
Get Recipe
I always make these chocolate cherry cookies for family gatherings, and they never last very long. They require a little extra effort, but they're worth it. —Marie Kinyon, Mason, Michigan
Get Recipe
My husband's grandma would only make these butter cutouts with a star cookie cutter. I use various shapes for celebrations throughout the year. —Jenny Brown, West Lafayette, Indiana
Get Recipe
These easy pumpkin cookies are pleasantly spiced. Everyone enjoys the soft, cake-like texture, too. —Lisa Chernetsky, Luzerne, Pennsylvania
Get Recipe
Cutting my favorite gingerbread cookie dough into snowflake shapes and decorating them with white icing was ideal for my theme get-together. I save these crunchy treats to enjoy on the way home from our Christmas tree outing. —Shelly Rynearson, Oconomowoc, Wisconsin
Get Recipe
Since chocolate mint is my favorite flavor combination, these dainty frosted treats are hard to resist. But I manage to save some for guests, because they make my cookie trays look so elegant. —Anne Revers, Omaha, Nebraska
Get Recipe
The only limit to these fun cutouts is your cookie cutter collection and your imagination! If you prefer crisp cookies, sprinkle with colored sugar before baking and skip the frosting. My family loves these easy holiday cookies! —Anne Grisham, Henderson, Nevada
Get Recipe
Before we five kids headed off to school each day, Mom took our requests for that day's dinner. I usually asked her to make these cookies for dessert, and she would rarely disappoint. I still enjoy them today. —Patricia Ramczyk, Appleton, Wisconsin
Get Recipe
What would Christmas be without overflowing tins of cookies? These festive filled cookies are the all time favorites of my family. Back when our children were small, we began baking them the day after Halloween and put them away in the freezer. —Audrey Thibodeau, Gilbert, Arizona
Get Recipe
My grandmother gave me a cookbook stuffed with recipes. This is a slight twist on one of the first—and best—recipes I made from the book. It's best to store these in the refrigerator. —Mary Murphy, Evansville, Indiana
Get Recipe
Some "dairy" merry snacking is guaranteed when you pass out these cashew-packed goodies! I found the recipe in a flyer promoting dairy products years ago. It's been this farm wife's standby ever since. —June Lindquist, Hammond, Wisconsin
Get Recipe
Add a touch of whimsy to your holiday spread with these chocolaty treats. They're perfect for getting little ones involved. —Taste of Home Test Kitchen
Get Recipe
I have fond memories of baking and frosting these cutout cookies with my mom. Now I carry on the tradition with my kids. It's a messy but fun day! —Sandy Nace, Greensburg, Kansas
Get Recipe
The rum, real butter and toffee bits made these cookies my husband’s new favorite. If you’d like them less sweet, skip the frosting and sprinkle the cookies with confectioners’ sugar while still warm. —Cindy Nerat, Menominee, Michigan
Get Recipe
This recipe has been handed down through many generations of my husband's family. The cookies were always in his grandmother's cookie jar when he'd visit. Today, he enjoys them more than ever—and so I do. —Debbie Hurlbert, Howard, Ohio
Get Recipe
The post How to Decorate Snowflake Cookies appeared first on Taste of Home.
Katie Bandurski


